Showing posts with label tutorial. Show all posts

Thursday, 19 May 2016

Featured Artist - Karthika on Shaker Cards with a Tute!

Hey all!!
I am so excited to have Karthikha Uday here with me today to be the on the Featured Artist series of Krafttime!!


Here is a little something about her :)

Hello Everyone,
This is Karthikha, an IT tech lead by profession, and a crafter by passion. I hail from the district of Erode, in TamilNadu, and settled in Hyderabad. I live with my husband and 1 year old daughter (who enjoys shuffling between Hyd and my mom's place!). 
I've been into paper crafts since my childhood, making simple greeting cards, origami objects and looking forward to the Arts and Crafts period every week in school. Once I got into the IT industry, I took it to the next level by actually gifting my colleagues with a birthday card. I love the joy of giving something handmade and seeing the happiness from the receiver's eyes!
I stumbled upon Indian Craft Room last year and that is when I got to know about contests, blogs, tools, techniques, etc. I started blogging just to participate in contests :) There was the trigger to explore the craft world and I have a loooot to learn!! I also try DIY projects when I find time. Apart from cards, I do quilling and have made quite some earrings for myself and friends!

Inspiration?
I find my inspiration for cards in a lot of places – the first being the design team members in each challenge! I love the works of Sonia suprabha, Neha Bhatt, Pratyusha, Sharada, Rhizwana, Pon Malar, Sathya, Manu Gupta, Jasleen, Bhavana, Pooja... ah this list goes on! Each one has a different style and there is a lot to learn and get inspired from. In quilling, Dr.Pritesh is my inspiration though I’m much at the beginner level and can never reach her level of awesome work!! I havent found my signature style yet but definitely something more towards CAS and quick cards. 

Social Galleries:
BlogFacebook.  Instagram.  Pinterest

On to you Karthika! Let s see what you have for us :)

Here is my first shaker card, a simple one!


I took black cs for my base, and scored the front side to add a little texture. Then I took another black panel, cut out a circle in the middle using rotary cutter. I attached a piece of acetate to the inner side, and now this gives my window for the shaker. 
I then cut out small pieces of foam tape and stuck around the circle. Added foam tape to the corners of the panel as well, filled the window with some colorful sequins and attached the panel to the base cs. There goes my shaker!! 


To add some interest, I cut out a golden hollow circle and framed it around the acetate using foam tape. The sentiment is stamped on vellum using versamark, heat embossed using gold and black embossing powders. It is then fussy cut and attached to the base. The card is ready !!!!

Thank you Karthikha!It was wonderful having you over!!!

Isn't is wonderful guys!!! Head over to her blog and show her some love!!!
I will be back with another featured artist soon :)

Love
Uma

Friday, 29 April 2016

Featured Artist - Akshma on Embossing with a Tute!!

Hey all!!
I am so excited to have akhma (atchaya) here with me today to be the first Featured Artist of Krafttime!!


Here is a little something about her :)

I am Atchaya(Akshma-Well known as Akshma rather than Atchaya as my craft creation name is Akshma and all my crafty profiles are in the name of Akshma).Well,I am basically from Kanyakumari district,now settled in Chennai.I have completed my masters in Computer science and engineering and have few months work experince in software concern(HCL tech.).Then I had plans of doing my PhD and i was  hunting guide for it and in the meanwhile by june 2015 i  started my crafts as my hobby.To be frank I was a complete bookworm and have never done crafts before.So crafts world was completely new to me  a year ago but i had the urge to learn a new thing.I came into the craft world completely to break me from my usual world of studies.Then i really got addicted to Crafts and have developed a great passion towards crafting.
   I started  off with quilling and am into proper card making by last november i guess,before that i did some cards that were fully with quilling.I do quilling,card making,decoupage,clay works,mural,zentangle,madhubani etc.Still a single enjoying my life and I do graphic designing and website development too.

Your inspiration?
The list is never ending.In quilling Yulia Broadskaya,Pritesh,Suganthi Mohan and when it comes to jewellery i get inspired from each and everyone in a facebook group Quilling queens(all do a wonderful job there).In card making Sonia suprabha,Rajni Chawla,Rashmi Jajodiya(for albums),Theresa Momber(masking) and so many as I have subscribed to so many youtube channels  i hardly remember their names.Each and everyone is a great inspiration to me in craft world as everyone amazes me with their work.

If you are working and crafting as a hobby, how do you manage both?
I do my graphic designing and crafts in parallel as of now.I think planning before hand will work.I used to plan all my contests and do them first and I make sure that i shouldn't get tensed because both graphic designing and crafts are completely my passion and i shouldn't ruin that by making me stressed.( I read novels a lot  too that makes me more light and am great fan of Chethan Bhagat)


Where to find You?
Blog: Facebook.  Instagram.  Pinterest

 Onto you Akshma!!

Thanks a lot Uma for this opportunity.This is the first time getting featured in a blog.Am very thrilled in writing up this post.Well in this post I will explain some basics of heat embossing.

  Embossing is nothing but it gives dimension or raised look to our cards.So many embossing types are there .I am just covering some basics of heat embossing with you all.Hope Some other crafter will  cover other types of embossing like dry embossing lets watch out this space..
     Fine what is heat embossing?? Create an embossed look by stamping the images with inks( that can hold the embossing powder )and then covering that area with embossing powder that gets melted when we heat it with a heat tool or heat gun.

 So what are the inks that can hold embossing powder?Any ink that dries slowly will work out.Mostly used one by all crafters are emboss ink ink or watermark ink  because they are sticky and its slow drying so it holds the embossing powder well.The most popular brand for watermark ink pad is  Tsukineko's Versamark watermark ink pad.We can also use pigment inks and distress inks as they are also slow drying.

   My suggestion is to buy a Versamark watermark ink pad.I have ranger perfect medium too ,it also works fine to hold embossing powder.
   Coming to the embossing powders,there are also many types like ultrafine,thick,glittery,metallic and so many brands available in the market.I have used ranger and american crafts zing embossing powder.Its enough to have some basic colors like black,white,clear and gold.We can explore a lot with these colors itself.
    Coming to heat tool I am using ranger heat it tool and you can get it from any leading craft shops in india.We can also use hot air gun as a cheaper alternative too but my suggestion is to go for some branded heat tool.
 I did a card ,tag and a bookmark with basic heat embossing and emboss resist techniques.
 1. Card:


  I took a bielo card stock that i received as gift from  Priya Sivaraj of The CraftShop.Really the card is of superb quality and it works well for embossing and watercoloring.

   I took chevron stamp and stamped it with versamark ink pad.Then sprinkle gold embossing powder over it.Tap off excess powder by tapping with our fingers or we can use paint brush or even cotton buds also to remove the extra embossing powders.Just keep a paper below and tap off the excess embossing powder and transfer it back to the bottle so we can use it back.Below is the pic after sprinkling the gold embossing powder over the stamped chevron.


Then heat it with the heat gun .Don't keep the heat gun very near to it,keep some distance and start heating.We can see how the embosssing powder melts and give a embossed look.Dont over heat it.Heat it and see visually when we get the embossed look just switch off the heat gun.Here's the card after heat embossing.

Then again I stamped a motivational quote and my fav quote stamp from kaisercraft tea break stamps.Sprinkled black glittery embossing powder over it and heat embossed.Here's the look of it:


I took hibiscus stamp from mudra's stamp(indian made stamps and my fav too) gold embossed it and fuzzy cut  it.Around 3 sets I made so we will get more depth and 3d look to it.Here's the look of fuzzy cut gold embossed stamps:

Then colored it with distress inks abandoned coral and peacock feathers for leaves.Here's the final card:


2.A tag using emboss resist:


What is emboss resist?

It's nothing but the embossed image will resist the added ink over it.Well let me explain it with this simple tag.

I took the bielo card stock and cut it into a tag and then gold embossed it with the happy girl stamp from mudra's stamps.here's the look of it:


Allow it to cool.After that apply inks directly over it but the embossed part wont get affected of it.It will just resist the inks.We can use any inks and check it.I have used distress inks blended many colors and applied directly over the gold embossed girl pic but see it the embossed pic have resisted the inks ,have a look at the tag:


Cool isn't it!!

I added the sentiment from the same stamp set.Here I didn't use watermark pad to stamp the image.I use the onyx versafine black pigment ink pad to stamp the image.


Then I sprinkled some black glittery embossing powders and heat embossed it.The pigment ink also holds the embossing powder well.So to just show that i made this.Here's the final look of the tag:

3.A simple bookmark with the variation of emboss resist called Joseph's coat technique/Emerging colors technique.

Here's the bookmark:

I started off with bielo card stock and made a colourful background by blending different distress inks.Here's the look of it:

I took the leaves stamp fro mudra's hibiscus stamp and randomly stamped it with watermark pad and sprinkled clear embossing powder.It just gives a transparent look after heating.Here's the look of it:

Leave some cooling period of 5 minutes and apply any darker colors over it and see the magic.The embossed images resist them and the colourful bg gets highlighted over the embossed regions.I used black soot distress ink and vintage photo DI and blended together directly over it and here's the final look of the boomark:

See how the colouful bg pops up by this technique.Cool right!!Well try these basic techniques and if any doubts feel free to ask.There are so many variations in emboss resist technique.May be some time I will cover all those and put it in my blog so just follow my blog to know  more about  this or  if  Uma permits(?!)will post here too.

Feel free to post your reviews and suggestions.Awaiting to hear those.


Ofcourse Aksma, we would love to have you here!!!
Isn't is wonderful guys!!! Head over to her blog and show her some love!!!
I will be back with another featured artist soon :)


Thursday, 31 March 2016

CASology - WASHI + In-laid die cutting TUTORIAL

Hi all,
I have a very simple CAS card to share with you also a new technique to those who have not tried it yet.

Let's check out the card first.
In-laid Die Cut CAS Card

This card is Inspired from Sid's version here. I have taken the concept of using washi tapes for die cut pieces and used it in my card.


Now What is In-laid die cutting?
It is basically die cutting your CS, then coloring or texturing it or embellish the die cut and then simply put it back in place from where it was cut out.

This creates a CUT yet NOT CUT effect. The die cut is in laid in the card itself :)

Here is how I went about creating this card.

First I lined up some washis in strips of alternating colors
In-laid Die Cut CAS Card
                       
I have used nesting scallop circles of two coordinating sixes and cut out from both CS and washi paper.
In-laid Die Cut CAS Card
                                   

In-laid Die Cut CAS Card

Then I just assembled it with the Washi outline circle. I have used the remaining negatives in the inside of the card.
In-laid Die Cut CAS Card
                                                
In-laid Die Cut CAS Card-Inside
Linking this to CASology Week 191 = WASHI

Let me know how it is guys!!

Sunday, 20 March 2016

CAS card and a tag + Tutorial

Hi all,
I recently purcahsed a "Light Bulb" stampset from Hot Off The Press and wanted to try it in a CAS card. I have used masking technique here and have captured he process below.
Let us take a look at the card first.

Masked Card using stamping and watercolors

Tag using Kaisercraft Script tag and waterwash using distress inks

Tutorial:
First I stamped the light bulb image and Sentiment using Archival ink and HOTP stampset. I drew a coluple of lines to mark off the portion where i wanted to do the masking. 
Masked Card using stamping and watercolors
Then I created a banner at the end of the card using some washi strips.

Masked Card using stamping and watercolors
Now leaving out the masked portion I colored the banner using distress inks.
Masked Card using stamping and watercolors


I made a matching tag using the same DIs and Kaisercraft "Srcipt" stamp. Here is the final look !!!

Masked Card using stamping and watercolors


Linking to the following challenges
1. ATCAS


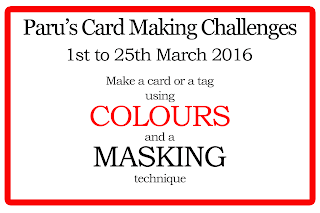
Paru's Card making Challenge : Masking
http://paruscardmakingchallenges.blogspot.in/2016/03/march-challenge.html


Ranganjali challenge : March Monthly challenge Watercolors

Peek-a-boo Challenge #4 Rainbow with Clouds: 
I have made a card and a tag :)


Happy crafting guys!
Hugs


Wednesday, 9 March 2016

Warm Birthday Wishes - Masking Technique Tutorial

Hi all,
I have a super cool project to share with your all today :)


Colorful Stamped Bookmark


Here is a step by step tutorial for this card :)

Here is what I started off with,

  • A piece of folded CS in dark green color
  • Plain white Neenah CS 
  • Post it Notes for masking
  • Love Stamps from Varnas
  • Distress Inks Kit #1
  • Washi Tape for masking
  • Cotton for distressing [I donot have any blending tool as of now, so blend using cotton balls :)]
  • Mini Butterfly stamp from HOTP small stampset
  • Happy Birthday sentiment from same set
  • Crochet thread


First up I stamped the heart onto a few post-it notes and cut it out for masking process
Then I adhered washi tape to the centre of CS and masked off the area for adding sentiment


I started off by stamping the heart off the CS. Now mask off the stamped portion using a mask cut out 


Stamp the next image. I continued this process and created a diagonal set using 'mustard seed' DI .


Next i did the same with 'spiced marmalade' DI on the top portion of yellow, and with 'picked raspberry' DI ont he bottom portion.
Finished off with 'peacock feathers' DI on the corners.


Once the entire stamping was done, i blended the same DIs on co ordinating areas.


I stamped some butterflies using 'red' pigment ink and fuzzy cut it. I removed off all masks including the washi tape and stamped "Birthday Wishes" sentiment on to the clean area.

Finished off by adding some thread in coordinating color and adding some butterflies. 
Adheres the finished piece to the CS

I made a maching embellishment sticker in coordinating colors and theme. This stamp is also from Varnas
This can be attached to any of your items on your desk or your notebook/artjournal etc.

Here is a colorful bookmark to go with the card. Doesn't it look yummy..If you thought it is stenciling you are wrong guys... It is created using a diy handmade eraser stamp and distress inks. WHat do you think of it guys!
Colorful Stamped Bookmark


Paru's Card making Challenge : Masking
http://paruscardmakingchallenges.blogspot.in/2016/03/march-challenge.html


Ranganjali challenge : March Monthly challenge Watercolors

Peek-a-boo Challenge #4 Rainbow with Clouds: 
I have made a card and a sticker :)


Happy crafting guys!
Hugs
Uma

Featured post

More than words - A Keepsake Pregnancy Journal

Hey there fellas! I know it has been a crazy long time since I wrote a post! Let me try to be more regular from here on :) One of the mo...