Sunday, 20 March 2016

CAS card and a tag + Tutorial

Hi all,
I recently purcahsed a "Light Bulb" stampset from Hot Off The Press and wanted to try it in a CAS card. I have used masking technique here and have captured he process below.
Let us take a look at the card first.

Masked Card using stamping and watercolors

Tag using Kaisercraft Script tag and waterwash using distress inks

Tutorial:
First I stamped the light bulb image and Sentiment using Archival ink and HOTP stampset. I drew a coluple of lines to mark off the portion where i wanted to do the masking. 
Masked Card using stamping and watercolors
Then I created a banner at the end of the card using some washi strips.

Masked Card using stamping and watercolors
Now leaving out the masked portion I colored the banner using distress inks.
Masked Card using stamping and watercolors


I made a matching tag using the same DIs and Kaisercraft "Srcipt" stamp. Here is the final look !!!

Masked Card using stamping and watercolors


Linking to the following challenges
1. ATCAS


Paru's Card making Challenge : Masking
http://paruscardmakingchallenges.blogspot.in/2016/03/march-challenge.html


Ranganjali challenge : March Monthly challenge Watercolors

Peek-a-boo Challenge #4 Rainbow with Clouds: 
I have made a card and a tag :)


Happy crafting guys!
Hugs


Wednesday, 9 March 2016

Napkin Fold Card + Flowery Belly Band

Hi Friends,
This is my first special fold card, " A Napkin Fold card"


I had so much fun doing it and got it decently right at the very first time.

I have used a 12X12 CS for the base so the finished card measures 6X6 when closed. I have decorated the insides using Pattern papers and die cuts. Here is how it opens up.


For the belly band I wanted to keep it simple and added some handmade flowers colored using DI and some leaves. Here is a close up. :)


Hope you like it!
Pumped to do a more intricate card next time :)

Hugs
Uma


Warm Birthday Wishes - Masking Technique Tutorial

Hi all,
I have a super cool project to share with your all today :)


Colorful Stamped Bookmark


Here is a step by step tutorial for this card :)

Here is what I started off with,

  • A piece of folded CS in dark green color
  • Plain white Neenah CS 
  • Post it Notes for masking
  • Love Stamps from Varnas
  • Distress Inks Kit #1
  • Washi Tape for masking
  • Cotton for distressing [I donot have any blending tool as of now, so blend using cotton balls :)]
  • Mini Butterfly stamp from HOTP small stampset
  • Happy Birthday sentiment from same set
  • Crochet thread


First up I stamped the heart onto a few post-it notes and cut it out for masking process
Then I adhered washi tape to the centre of CS and masked off the area for adding sentiment


I started off by stamping the heart off the CS. Now mask off the stamped portion using a mask cut out 


Stamp the next image. I continued this process and created a diagonal set using 'mustard seed' DI .


Next i did the same with 'spiced marmalade' DI on the top portion of yellow, and with 'picked raspberry' DI ont he bottom portion.
Finished off with 'peacock feathers' DI on the corners.


Once the entire stamping was done, i blended the same DIs on co ordinating areas.


I stamped some butterflies using 'red' pigment ink and fuzzy cut it. I removed off all masks including the washi tape and stamped "Birthday Wishes" sentiment on to the clean area.

Finished off by adding some thread in coordinating color and adding some butterflies. 
Adheres the finished piece to the CS

I made a maching embellishment sticker in coordinating colors and theme. This stamp is also from Varnas
This can be attached to any of your items on your desk or your notebook/artjournal etc.

Here is a colorful bookmark to go with the card. Doesn't it look yummy..If you thought it is stenciling you are wrong guys... It is created using a diy handmade eraser stamp and distress inks. WHat do you think of it guys!
Colorful Stamped Bookmark


Paru's Card making Challenge : Masking
http://paruscardmakingchallenges.blogspot.in/2016/03/march-challenge.html


Ranganjali challenge : March Monthly challenge Watercolors

Peek-a-boo Challenge #4 Rainbow with Clouds: 
I have made a card and a sticker :)


Happy crafting guys!
Hugs
Uma

Monday, 7 March 2016

Pretty In Pink - ICR Challenge [Flowers + No Cards]

Hello Friends ,
Here to share a quick embellishment I made using some really pretty pattern papers with flowers.
This is a simple origami dress fold created using 5" X 5" square piece of pattern paper. It is really quick and east to do and makes fun embellishments for girly-girl cards.

Right in time for International Women's day too!
Happy Women's day to all you wonderful people out there and my crafty friends!!


Linking this to Indian Craft Room: Anything goes with flowers + NO CARDS


Catch you later folks!
Uma

Wednesday, 2 March 2016

In Dreams And In Love - A Rainbow masked card + Tutorial

Hi all!!!
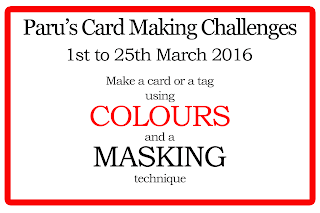
I have a very refresing card + tutorial for you. I am playing along Paru's Card Making Challenges this month and the challenge is to use a masking technique. I have created the card below which is a rainbow panel using masking technique. 

Know what? You do not need many colors on your pallete to create this. I have just 4 pads of distress ink + my black archival. Those are the colors that i used to get this color blast. Since the theme was to include colors too, I felt how more apt can you get than to include as much as possible.

Take a look at the card first :)

Rainbow Card- Masking Technique

Rainbow Card- Masking Technique
Linking this this project to Paru's Card Making Challenges.

Tutorial:
To make this card I used a piece of cardstock along with inks in Tim Holtz mini ink kit #1 [Mustard Seed, Spiced Marmalade, Peacock feathers, Picked Raspberry] .


Then I took some washi tape and masked the entire card using the strips like below.


Once I did that I peeled off first two layers and applied 'mustard seed' distress ink. Put back the first washi tape layer back in place to mask off the first yellow stripe.

I removed the third panel off and applied spiced marmalade DI over panels #2 and #3. So with just 2 colors I have got 3 color panels now. Similarly I proceeded with picked raspberry DI over panels #4 and #5.


Panel #6 is created by blending picked raspberry & peacock feathers. #8 using peacock feathers and mustard seed


#9 is the Black Archival ink that you see. Finally once all panels were inked up, I inked the edges using black ink and splattered some water to create some droplets.


Then I stamped the sentiment using Varna's stampset and distressed the edges and adhered it to the centre of the card.


I also createda  custom envelope for this card and stamped some flowers on the front suing simple paper masking.


Hope you all like this card. Do let me know how this turned out!!

Happy crafting:)
Uma

Valentines Day Challenge Winner!!

Hi Pals,

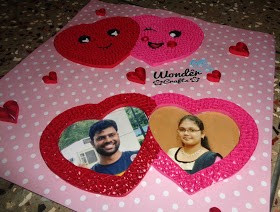
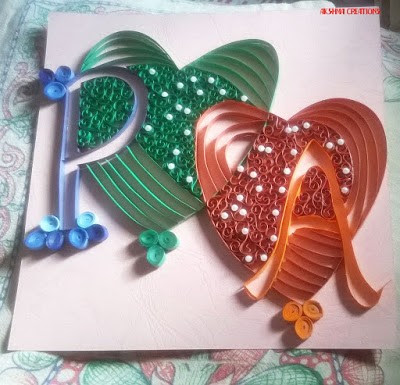
We had some really good response for the contest and there were 5 entries to it. All of them were really wonderful and a big THANK YOU to all who entered.
Here are the 5 entries. Please visit their bog and leave some love for the work done!
And here is the winning entry!!! Congratulations Akshma :) Your layout was voted up by both the judges (Rijutha & Vyshali). Clean, Effective and apt for the theme :)


You win  a gift voucher worth 500 INR from Crafters Corner.

Other entries!!

JayShree:

Wonder Crafts:

Akshma Aksh:


 Quilling Speaks:


Akshma, Please write to me to claim your prize and have fun with the goodies :) :)

Happy Crafting!

Featured post

More than words - A Keepsake Pregnancy Journal

Hey there fellas! I know it has been a crazy long time since I wrote a post! Let me try to be more regular from here on :) One of the mo...